- 1. Introduction: Why Stencil Accuracy Matters
- 2. Understanding Stencil Paper: Layers, Types, and Uses
- 3. Prep Is Everything: Skin, Tools, and Transfer Surface
- 4. Method One: How to Use Stencil Paper with a Thermal Printer
- 5. Method Two: Manual Tracing (Freehand Transfer)
- 6. Application on Skin: Pressure, Timing, and Drying
- 7. Dry Time and Aftercare: Protecting Your Design
- 8. Advanced Tips: Repositioning, Wrapping Skin, Curved Surfaces
- 9. Frequently Asked Questions (FAQ)
1. Introduction: Why Stencil Accuracy Matters
In tattooing, everything starts before the needle touches the skin. Whether you’re creating a small wrist symbol or a full-sleeve outline, the quality of your stencil often decides how the session will go. A clean transfer makes the difference between flowing confidently through a design and stopping every few minutes to double-check your lines.
Many beginners assume stencil paper works like a sticker—press it on and you’re good to go. But in reality, how to use stencil paper for tattoos the right way is a process with multiple steps, each of which affects how well your design sticks and stays. Smudging, fading, poor alignment—these aren't just beginner mistakes, they're signs that something in the prep, application, or material choice needs adjusting.
Across artist communities and Reddit threads, one theme shows up again and again: getting the stencil right is half the job. Artists who struggle with blurred lines or fading stencils often find the problem wasn't the design—it was surface prep, paper layering, or drying time.
That’s what this tattoo transfer paper guide is for. We’ll walk through paper types, prepping the skin, working with both printers and freehand tools, and finishing with techniques that keep your design sharp from transfer to tattooing. This is for first-timers who’ve never used stencil paper, but also for intermediate artists ready to stop guessing and start controlling results.
2. Understanding Stencil Paper: Layers, Types, and Uses
Before you can apply a stencil properly, you need to understand what stencil paper actually is—and what it isn’t. While it might seem like just another sheet in your setup, stencil paper is built with layers that each play a specific role in transferring your artwork from idea to skin.
Whether you're printing digitally or tracing by hand, choosing the right paper and knowing how it functions is the foundation of any good stencil. This section breaks down the types of stencil paper available and how they work.
Basic Structure: The Four Layers of Thermal Stencil Paper
Most stencil paper used for thermal transfer has four layers:
|
Layer |
Description |
|
Top sheet |
The white layer where your design will appear after tracing or printing |
|
Pigment layer |
Typically purple or blue, this is the transferable ink |
|
Tissue sheet |
Thin separator to prevent premature transfer or smudging |
|
Back sheet |
A thicker backing that holds the layers together during handling and printing |
Knowing which side to print or trace on is critical. One of the most common mistakes beginners make is loading the paper backward into the printer or tracing on the wrong layer—resulting in either blank sheets or reversed stencils.

Types of Stencil Paper and When to Use Each
Not all stencil papers are made the same. Depending on your method—manual tracing or thermal printing—you’ll need to choose the right type of stencil paper.
|
Stencil Paper Type |
Best For |
Application Method |
|
Thermal Transfer Paper |
Digital designs with clean linework |
Thermal printer (no ink needed) |
|
Freehand Carbon Paper |
Manual sketches, on-the-fly adjustments |
Hand tracing with stylus/pen |
|
Hectograph (Spirit-style) |
Traditional by-hand stencil creation |
Pressing onto skin with gel |
Some Reddit users recommend keeping both types on hand, especially when working across different skin textures or placements. For instance, while thermal paper offers crisp results, some artists prefer freehand sheets for curved areas where adjustments are easier to make mid-transfer.
Don’t Rely on Just Color
Stencil paper is often labeled by the color of its transfer layer (blue, purple, etc.), but don’t assume every blue paper works the same. Some brands are optimized for laser printers, while others respond better to stylus pressure or specific stencil gels. What matters most is how the pigment layer reacts under heat or pressure—not the color of the sheet.
Real-World Frustrations (And Fixes)
In one Reddit discussion, a frustrated beginner shared that their stencil kept rubbing off during linework. After checking their gear, it turned out they had used freehand paper with a thermal printer. It's a simple mistake, but one that ruins your flow and costs time.
Understanding your materials is part of building control. Once you know which stencil paper works with your method, the rest of the process becomes far less frustrating.
Need help picking the right stencil material? Read our tattoo stencil paper comparison here.
3. Prep Is Everything: Skin, Tools, and Transfer Surface
Even the best-designed stencil and high-end stencil paper won’t help if your prep work is sloppy. In fact, most stencil failures aren’t about the paper at all—they’re about what’s happening on the skin. Oils, moisture, uneven surfaces, or leftover lotion can ruin the transfer in seconds.
This section covers the real-world stencil paper instructions that make your setup work—from cleaning skin properly to organizing your tools the right way.
Step 1: Clean the Skin—Thoroughly
Don't just swipe with an alcohol pad and call it done. Proper stencil adhesion depends on skin being:
• Oil-free
• Dry but not flaking
• Hair-free
• Free of lotions or sweat
Prep sequence:
1. Shave the area gently, even if no hair is visible. Fine hair can lift the stencil.
2. Wipe thoroughly with 70% isopropyl alcohol (not 90%—it evaporates too fast).
3. Let the skin dry for 30–60 seconds before applying anything else.
A Reddit user once said they “blamed the stencil paper for weeks until I realized my alcohol wasn’t removing the lotion my client had used that morning.” Clean skin matters.

Step 2: Set Up Your Workspace
Before you even pick up the stencil, your tools should be laid out and ready. Nothing ruins a perfect transfer faster than fumbling with wet gloves or dirty towels mid-process.
Suggested setup:
• Clean paper towels (folded, not bunched)
• Fresh gloves
• Transfer medium (gel, deodorant, or skin-safe adhesive)
• Mirror (for client placement check)
• Timer or watch (for drying intervals)
Step 3: Apply Transfer Medium the Right Way
This is where a lot of stencil transfers go wrong.
Too much = smudging
Too little = incomplete lines
Wrong product = fading or stickiness
Spread the stencil gel (or alternative) in a thin, even layer using gloved fingers. It should feel tacky—not wet. Wait 10–15 seconds after application before placing the stencil.
💡 Pro tip from multiple Reddit discussions: rub the medium in until you hear it "squeak"—that’s when the skin has the right tackiness.
🧤 Step 4: Change Gloves
It’s a small move, but it makes a huge difference. After applying the transfer medium and before touching the stencil sheet:
• Remove your gloves
• Put on a new pair
• Avoid touching anything else during the process
Smearing often comes from transfer medium left on the fingers or palms—especially when pressing down the paper.
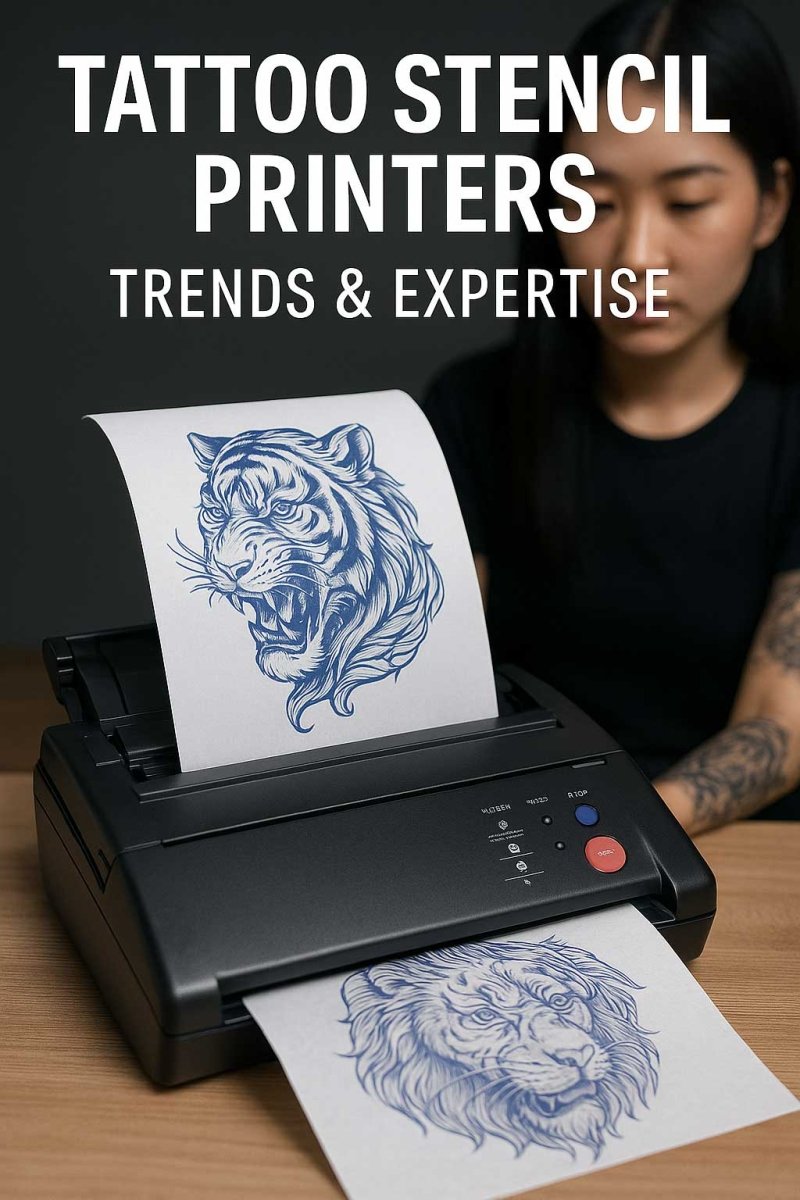
4. Method One: How to Use Stencil Paper with a Thermal Printer
For many artists, especially those working with digital designs, thermal printers offer the best way to apply stencil paper quickly and with high precision. But even with a solid setup, one wrong move—like loading the paper backward or using the wrong contrast setting—can waste a stencil and kill your momentum.
This section walks you through the exact steps for using stencil paper in a thermal printer, while also pointing out common mistakes and small adjustments that make a big difference.
Step 1: Prepare Your Design File
Before touching the printer, prep your artwork.
• Flip the image horizontally (mirror it) so it transfers correctly on skin
• Increase line contrast (black lines only, no gray shading)
• Make sure the resolution is sharp enough (300 dpi or higher recommended)
• Resize the design to match the body part—A4 paper limits still apply
If you’re using an app or desktop software, export your design as a PDF or PNG to avoid scaling errors during print.
Step 2: Load the Stencil Paper Correctly
This is where many beginners mess up.
• Open the printer
• Remove the protective tissue sheet if required by your printer model
• Insert the stencil paper so that the top white sheet is facing outward, and the pigment layer is facing the heating bar
• Double-check alignment so the sheet feeds evenly—crooked paper = crooked lines

Step 3: Adjust Printer Settings
Most thermal printers have a few adjustable options. Try these for optimal results:
|
Setting |
Recommended Value |
|
Print contrast / density |
Medium-high (too dark may smudge lines) |
|
Print speed |
Normal (slow speed may over-burn edges) |
|
Paper type |
Plain or Thermal |
A Reddit user once shared they solved weeks of smudged transfers just by switching from “Dark” mode to “Medium” print contrast.
Step 4: Print and Check Output
After printing, inspect the stencil:
• Lines should be sharp, not fuzzy
• Edges shouldn’t blur or bleed
• Corners of the paper should stay flat—not curled or overheated
If you notice burn marks, reduce print density. If lines are faint, increase contrast slightly.
Step 5: Handle with Clean Gloves
Immediately after printing:
• Set the stencil sheet on a clean, flat surface
• Avoid touching the printed area
• If needed, cut around the design to make placement easier on curved skin areas
From here, follow the same application steps we outlined in the previous section—transfer medium, clean gloves, steady pressure, and drying time.
Thermal printing isn’t foolproof, but once you learn how to adjust for humidity, printer quirks, and paper quality, it becomes one of the fastest and most reliable ways to transfer a clean stencil—especially for line-heavy, symmetrical, or complex designs.
5. Method Two: Manual Tracing (Freehand Transfer)
Not every artist works from a digital design. For those who like to draw directly, customize on the fly, or work with irregular body shapes, manual tracing offers a level of control that thermal printers just can’t match. It takes more time, but it also lets you adjust your lines with the body’s flow—something machines still can’t replicate.
This is the method many artists start with when learning how to make tattoo stencil stick effectively, because it trains your eyes, your hands, and your patience.
Step 1: Select the Right Paper for Freehand
Unlike thermal transfer, freehand methods work best with carbon-based stencil paper that reacts to pressure. Most of these sheets have three layers:
1. Top white sheet (you draw on this)
2. Middle pigment layer (usually purple or blue)
3. Bottom backing paper (keeps everything aligned)
Don’t remove any layers—just fold the bottom edge or tape the sheets together to keep them stable while you draw.
Step 2: Use the Right Tools
Forget pencils or markers—they don’t press hard enough. Go with:
• Ballpoint pens (medium tip)
• Stylus or tattoo stencil pen
• Non-oily hands and dry surface
Keep your pressure firm and steady. If you press too light, the pigment won’t transfer. If you press too hard, you’ll tear through the top sheet or create thick, hard-to-read lines.
A Reddit user said it best: “You’re not drawing—you’re pressing your vision into a second layer. That mental shift helps a lot.”

Step 3: Keep the Sheet Stable While You Work
Use masking tape or binder clips to fix the paper to a clipboard or hard surface. Avoid resting your palm over areas you’ve already traced, or you’ll smear the lines.
Work from top to bottom or left to right (depending on hand dominance), and check occasionally by lifting a corner to make sure the pigment is transferring cleanly to the underside of the top sheet.
Step 4: Trim and Align
After tracing, cut out the design as close to the linework as possible. This makes it easier to position on the skin and reduces the chance of unwanted pigment edges transferring.
Use landmarks on the body (elbows, knees, spine) to help with accurate placement, especially for symmetrical or multi-part designs.
Step 5: Apply Like Any Other Stencil
Once traced and trimmed, treat it like a printed stencil:
• Apply stencil gel to clean, prepped skin
• Wait 10–15 seconds for tackiness to build
• Apply the stencil from the center outward
• Press evenly and hold for 10–20 seconds
• Peel away slowly from one corner
Drying time matters just as much here. Give it at least five minutes to air dry before touching or tattooing.
While freehand takes longer than thermal printing, many artists find it helps them connect more closely with the design. It also allows last-minute edits or customizations without needing to return to a digital file. In time, manual tracing becomes less of a fallback and more of a creative tool.
6. Application on Skin: Pressure, Timing, and Drying
This is the moment when all your prep, tools, and patience come together—or fall apart. Applying the stencil to the skin may seem like the easy part, but even experienced artists will tell you it’s often where things go sideways. If you press unevenly, lift too early, or rush the drying, even the most beautiful design can smear or fade within minutes.
This section is your tattoo transfer paper guide for real-world application—exactly how to apply stencil paper so it stays clean and in place, with steps, visuals, and a full troubleshooting chart.
Step 1: Line Up and Hold Steady
Start by trimming your stencil as close to the design edges as possible. This helps with body placement, especially around curves like ribs or shoulders.
Before you touch skin, ask your client to hold the pose they’ll be in during tattooing. Standing upright versus leaning over can shift skin tension dramatically. Then:
• Gently press the stencil to the skin, starting from the center of the design
• Work outward, pressing with your palm or fingers in a firm, even motion
• Avoid sliding or repositioning after first contact
• Hold the stencil in place for 10 to 20 seconds, depending on humidity and skin texture

Step 2: Peel and Inspect
Peel the stencil slowly from one corner, like lifting a sticker. Don’t rip or pull it quickly—doing so can stretch the design or leave pigment behind.
Check for:
• Even pigment transfer across the entire design
• No skips or empty patches
• Lines that are sharp, not fuzzy or double-printed
If anything looks off, stop. You’re better off cleaning the skin and starting again than trying to guess where the correct line should have been.
Step 3: Let It Dry (No Excuses)
This step gets skipped more than any other—and it’s also one of the most important.
Let the stencil dry for at least 5 to 10 minutes before touching it again. Some artists even wait longer depending on humidity. During that time:
• Avoid wrapping, wiping, or rubbing the skin
• Don’t apply gloves or lean on the stencil
• Let air (not fans) circulate naturally
One experienced Reddit user shared that they apply the stencil, then set up needles and inks while it dries. By the time they’re ready to tattoo, the stencil is fully set.
Common Problems and Quick Fixes
|
Problem |
Likely Cause |
Fix |
|
Stencil fades quickly |
Skin too oily or stencil not dry |
Re-clean skin, dry longer before touching |
|
Lines smear when wiping |
Too much transfer gel or gloves touched design |
Use less gel; change gloves after applying stencil |
|
Half the design missing |
Uneven pressure or paper moved |
Apply again with steady pressure; use palm not fingertips |
|
Stencil shifts or doubles |
Slid paper during placement |
Peel off fully, clean, reapply from scratch |
Following this method consistently removes the guesswork. You’ll start to notice fewer re-dos, less frustration, and better overall flow during the actual tattoo session. It’s not about being perfect—it’s about being consistent.
7. Dry Time and Aftercare: Protecting Your Design
After applying the stencil, it’s tempting to jump straight into tattooing—especially when the lines look sharp and everything feels ready. But skipping or rushing the drying stage is one of the biggest reasons stencils fail mid-session.
Even the best way to apply stencil paper will fall short if you touch, wipe, or stretch the skin before the pigment has fully bonded. This section helps you protect your design in those crucial minutes after transfer, so you don’t lose time redoing the stencil—or worse, tattooing over blurred lines.
How Long Should You Let the Stencil Dry?
• Minimum drying time: 5 minutes
• Ideal time in humid environments: 10 minutes or more
• Avoid drying shortcuts: no fanning, no patting, no blowing—just let it rest
If you're working on a large piece or full-day session, the stencil needs to withstand gloves, movement, and skin heat. That only happens when it's allowed to set completely.
💬 One user on Reddit said, “My stencils used to smear halfway through lining. Now I apply, wait 10 minutes, change gloves, and the design holds through the full session—every time.”
🧤 Change Gloves (Again)
Once your stencil is on, change gloves before doing anything else—again. Why?
• Transfer gel residue on gloves can pick up pigment
• Sweaty palms (yes, it happens) can reactivate the surface moisture
• Even gentle handling can blur fine lines
Use a fresh, dry pair of gloves before adjusting your workstation, setting up your ink, or helping the client reposition.
📏 Avoid Stretching the Skin Too Early
When the stencil is fresh, the skin under it is still absorbing pigment and drying. Stretching it prematurely (for example, to show the client in a mirror or check symmetry) can deform the lines.
• If you need to check positioning, do it before applying the stencil
• If a client wants to stand or move, wait until after the stencil has dried completely
Wiping vs. Blotting During Tattooing
Even after the stencil has dried, how you clean the area matters. Avoid wiping in circular motions, which can gradually break down stencil edges.
Instead:
• Blot with folded paper towels
• Use slow, one-directional wipes only when necessary
• Clean around the stencil, not directly over it, until linework is complete
These small aftercare steps may feel tedious, especially during busy days or simple designs. But they make a difference—not only in how long the stencil lasts, but in how confidently you can focus on the actual tattoo.
A stencil that stays strong until the last line is finished isn’t a bonus—it’s the baseline you should aim for every time.
8. Advanced Tips: Repositioning, Wrapping Skin, Curved Surfaces
Once you’ve got the basics down, stencil application becomes less about getting it to stick—and more about getting it to work across real-world conditions. Arms curve, ribs move, clients breathe, and sometimes even the best stencil shifts just enough to throw off your alignment.
These advanced tips are for artists looking to improve how they handle difficult placements, long designs, and touchy skin zones, while keeping transfers clean and steady.
Repositioning Without Losing the Design
It happens: you press the stencil, peel it back, and realize it’s off by 5 degrees or half an inch. Instead of starting over from scratch:
1. Lightly mark anchor points on the skin before applying the stencil (elbow tips, shoulder bones, spine center, etc.)
2. If you need to remove a crooked stencil, clean with 70% isopropyl alcohol only—no soap or wipes
3. Wait for the skin to fully dry again before reapplying
4. Use your anchor points to realign the paper, then press again with care
Some artists also trace key areas with a skin-safe marker before removing the stencil, allowing for cleaner reapplication.
Segmenting Large Designs for Better Fit
When working with full sleeves, chest panels, or back pieces, trying to apply one giant stencil usually ends badly. The better approach is to break the design into overlapping segments and apply each one separately.
Steps:
• Print or trace each section on its own stencil sheet
• Apply one segment at a time, allowing overlap at joints
• Use thin lines or tick marks to help you match up spacing across pieces

Working With Curved or Moving Areas
Ribs, knees, and shoulders all flex and stretch—so stencils laid flat often shift when the client moves or breathes. A few things can help:
• Ask the client to breathe normally and hold still for 10–15 seconds while you press the stencil
• Cut relief slits into the edges of the stencil paper to allow it to bend more naturally
• Use flexible tracing paper (acetate sheets) as a bridge—print your stencil on it first, then press it to the skin like a second stencil layer
Reddit artists often call this the “acetate transfer method”—it’s especially helpful when wrapping tattoos around the calf, forearm, or neck.
Dry Hands = Clean Transfers
Even when your stencil is perfect, your hands can ruin it. Keep these habits:
• Dust your gloves lightly with talc or use paper towel barriers when adjusting skin
• Re-glove again before any cleanup
• Avoid leaning your forearm or hand on stencil areas when setting up your gear
When in Doubt, Start Fresh
Finally, don’t be afraid to remove a stencil that feels even slightly off. It’s tempting to “make it work,” but trying to adjust during linework is far more stressful than taking five minutes to reapply it cleanly.
Artists who consistently produce clean work often spend the most time on stencils—not because they’re slow, but because they know a good stencil makes everything that follows faster and more accurate.
9. Frequently Asked Questions (FAQ)
1. What’s the difference between thermal and carbon stencil paper?
Thermal stencil paper is designed for use with stencil printers, especially thermal copiers or Bluetooth tattoo printers. It has heat-reactive pigment that transfers when printed. Carbon stencil paper is made for hand-tracing and works by pressure, not heat. Choosing the right paper depends on whether you're printing or freehand drawing your stencil.
2. Can I use regular printer paper instead of stencil paper for tattoos?
No. Regular paper won’t transfer pigment to the skin and doesn’t hold up when applied with transfer gel. You need actual stencil paper, which contains a pigment layer meant to transfer cleanly when pressed or printed.
3. How long should I wait after applying the stencil before tattooing?
Wait at least 5 to 10 minutes to let the stencil dry fully on the skin. In humid environments, waiting even longer helps. Touching or stretching the skin too early can cause smudging or fading.
4. My stencil keeps smudging—what am I doing wrong?
Check your stencil paper instructions and your prep steps. Common issues include:
• Using too much transfer gel
• Not drying the skin completely
• Touching the stencil with dirty gloves
• Not allowing enough drying time
Even small adjustments in technique can greatly improve the results.
5. How do I get a stencil to stick better to oily or sweaty skin?
Use 70% isopropyl alcohol to wipe the skin thoroughly and let it dry fully. Avoid moisturizers or pre-wipes with aloe or glycerin. You can also look into stronger transfer gels designed specifically for oily skin.
6. Can I reposition a stencil after it’s already on the skin?
Technically, no. Once the stencil is applied, lifting and adjusting it will distort the image. If it's misaligned, it's best to wipe it off, clean the skin again, and reapply. Use reference marks or segmented designs to help with accurate placement.
7. What’s the best way to apply stencil paper on curved areas?
Use relief cuts on the edges of the stencil to help it wrap around curves. For very tricky spots like ribs or joints, work in smaller sections. Always apply pressure from the center outward, and keep the body still while pressing.
8. Do I need a special printer to use stencil paper?
If you're using thermal stencil paper, yes—you'll need a thermal tattoo printer. Inkjet or laser printers will not work. If you’re using carbon-based stencil paper, no printer is needed—you can hand-trace directly onto it using a ballpoint pen or stylus.
Share:
How to use tracing paper for tattoos?
Beginner Tattoo Stencil Outlines: How to Print & Use Simple Flash Designs at Home